Understanding Terraform Code for AWS Deployment
Understanding Terraform Code for AWS Deployment
In this post, we will walk through a Terraform script that sets up an autoscaling instance in AWS. This script is a great example of Infrastructure as Code (IaC), a method where infrastructure setup is automated and treated just like any other code.
Let’s break down the script:
1
2
3
4
5
6
7
8
9
10
11
12
13
14
15
data "aws_ami" "app_ami" {
  most_recent = true

  filter {
    name   = "name"
    values = ["bitnami-tomcat-*-x86_64-hvm-ebs-nami"]
  }

  filter {
    name   = "virtualization-type"
    values = ["hvm"]
  }

  owners = ["979382823631"] # Bitnami
}
This block of code is used to fetch the most recent Amazon Machine Image (AMI) that matches the specified filters. In this case, we are looking for an AMI provided by Bitnami that runs Tomcat on a Hardware Virtual Machine (HVM). The owners field specifies the AWS account ID of the image owner, which is Bitnami in this case.
1
2
3
4
5
6
7
8
9
10
11
12
13
14
module "blog_vpc" {
  source = "terraform-aws-modules/vpc/aws"

  name = "dev"
  cidr = "10.0.0.0/16"

  azs             = ["us-west-2a","us-west-2b","us-west-2c"]
  public_subnets  = ["10.0.101.0/24", "10.0.102.0/24", "10.0.103.0/24"]

  tags = {
    Terraform = "true"
    Environment = "dev"
  }
}
This block of code creates a Virtual Private Cloud (VPC) in AWS. The VPC is named “dev” and has a CIDR block of “10.0.0.0/16”. It also specifies the availability zones and the public subnets within those zones. The tags field is used to add metadata to the VPC.
1
2
3
4
5
6
7
8
9
10
11
12
13
14
module "blog_autoscaling" {
  source  = "terraform-aws-modules/autoscaling/aws"
  version = "6.5.2"

  name = "blog"

  min_size            = 1
  max_size            = 2
  vpc_zone_identifier = module.blog_vpc.public_subnets
  target_group_arns   = module.blog_alb.target_group_arns
  security_groups     = [module.blog_sg.security_group_id]
  instance_type       = var.instance_type
  image_id            = data.aws_ami.app_ami.id
}
This block of code sets up an autoscaling group for our application. The autoscaling group will ensure that there is always at least one instance running and will scale up to two instances if needed. The instances will be launched in the public subnets of our VPC and will use the specified AMI.
1
2
3
4
5
6
7
8
9
10
11
12
13
14
15
16
17
18
19
20
21
22
23
24
25
26
27
28
29
30
31
32
33
module "blog_alb" {
  source  = "terraform-aws-modules/alb/aws"
  version = "~> 6.0"

  name = "blog-alb"

  load_balancer_type = "application"

  vpc_id             = module.blog_vpc.vpc_id
  subnets            = module.blog_vpc.public_subnets
  security_groups    = [module.blog_sg.security_group_id]

  target_groups = [
    {
      name_prefix      = "blog-"
      backend_protocol = "HTTP"
      backend_port     = 80
      target_type      = "instance"
    }
  ]

  http_tcp_listeners = [
    {
      port               = 80
      protocol           = "HTTP"
      target_group_index = 0
    }
  ]

  tags = {
    Environment = "dev"
  }
}
This block of code sets up an Application Load Balancer (ALB) for our application. The ALB will distribute incoming traffic across all instances of our application. The ALB is associated with the same VPC and subnets as our instances.
1
2
3
4
5
6
7
8
9
10
11
module "blog_sg" {
  source  = "terraform-aws-modules/security-group/aws"
  version = "4.13.0"

  vpc_id  = module.blog_vpc.vpc_id
  name    = "blog"
  ingress_rules = ["https-443-tcp","http-80-tcp"]
  ingress_cidr_blocks = ["0.0.0.0/0"]
  egress_rules = ["all-all"]
  egress_cidr_blocks = ["0.0.0.0/0"]
}
The final block of code sets up a security group for our application. This security group allows incoming traffic on ports 80 (HTTP) and 443 (HTTPS) from any IP address (0.0.0.0/0). It also allows all outgoing traffic.
The final implementation of the main.tf:
1
2
3
4
5
6
7
8
9
10
11
12
13
14
15
16
17
18
19
20
21
22
resource "aws_vpc" "dev" {
  cidr_block  = var.vpc_cidr

  tags = {
    Name = var.vpc_name
  }

}

resource "aws_subnet" "dev" {
  count       = length(var.subnets)
  vpc_id      = aws_vpc.dev.id

  cidr_block  = cidrsubnet(aws_vpc.dev.cidr_block, 4, count.index + 1)

  tags = {
    Name = var.subnets[count.index]
  }

}
Let’s see the work done via the AWS console.
Navigating down to “Load Balancer” on the left hand side of the EC2 page, the Load Balancer instance should be appear on the right hand side. Simply clicking to the checkbox to its immediate left should bring up the Load Balancer’s details.
 The Details page of our Load Balancer. Notice the Scheme “Internet-facing” and the frontend URL under “DNS name”.
Copying and pasting the URL into the address bar of your preferred browser will lead you to a page similar to the one below.
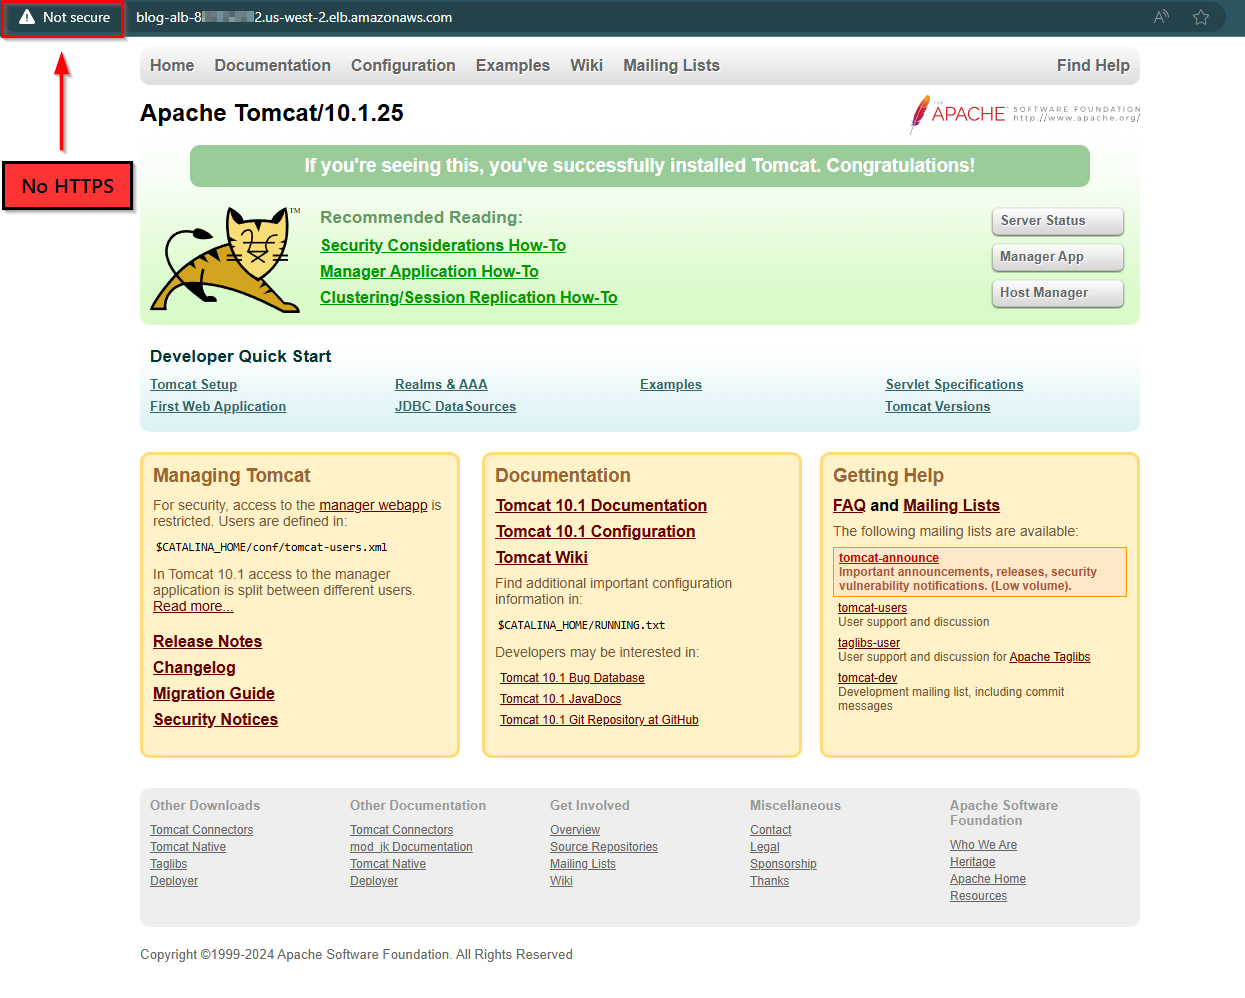 Frontend URL of the Load Balancer leads us to our VM’s homepage.
Notice that our forgoing of implementing HTTPS results in our page being marked as “Not secure”.
Summary and Next Steps
Though this particular implementation wasn’t the most sophisticated approach, this Terraform script is a great example of how to automate the setup of a scalable and highly available application on AWS.
As far as next steps are concerned, we could consider implementing a hub-and-spoke network with more VMs, creating restrictions on which VMs should be allowed to talk to each other and be reached by the internet.
By using Infrastructure as Code, we can ensure that our infrastructure is consistent, repeatable, and easy to manage.
Sources and Relevant Documentation:
github.com/ericpiros/AWS/terraform/Terraform_with_AWS-Zero_to_Hero